
If you've been following my cosplay articles in the past, you might have noticed my Brother Warth and Captain Cold
costumes. I love these costumes because I love gimmicks. Brother Warth had a light-up LED power ring
and parts of the costume lit up under camera flashes because of
retro-reflective vinyl. Captain Cold is
slightly different: it had a cold gun that had a bright blue LED, which was also a
miniature fog machine.
I thought to myself, maybe I should introduce a fresh new
gimmick that’s very visually exciting, and just plain looks like fun. Being a fan of action figures and miniatures,
it is always a treat to have toys with translucent parts, and even cooler,
add-on transparent parts. I started noticing that SH Figuarts even starts
selling effect parts either specifically for certain toys SEPARATELY or just awesome
general effect parts. I, being myself,
who doesn’t have a filter, thought it would be nice to have life-sized effect
parts for my costumes.
What to do and how to do it though? I used to work with resin, plexiglass, and
other clear and semi-clear materials, but all those are very expensive, time
consuming, and for the plexiglass, difficult to create certain ethereal shapes
that I would want to recreate. Resin
could definitely be an option, but casting, dying, and making sure resin is the
right consistency is a pain in the ass for me, especially since I thought about
all of this, two days before Anime LA.
Then, as I stared at my dripping gluegun (which blew out
right in the middle of my other project BTW), and my smoldering hot knife .... it played in my head, almost
in a playful fashion, and in the tone of “Do you want to build a Snowman?” (ironically)…. “Do you want to melt some plastic?!”
YES!
 |
| The tools you'll need. |
DISCLAIMER: Kids don't do this at home.... and if you are not a kid, and in fact a responsible adult, please wear the proper safety equipment. Melted plastic is very carcinogenic. Always wear a proper respirator (that means don't jsut wear a dust mask or a hankerchief over your nose) and work in a well-ventilated area! Also wear proper safety glasses, gloves (if applicable), and have a fire extinguisher handy at all times.
The first thing I did, like so many other demented potential pyromaniacs, is "What shall I melt?" and again, I found the inspiration around me. My working area has a clear yellow soft plastic cup that I use as a water cup for when I paint with acrylic paints. It got too close to my hot knife, and it melted.
I took a whole bunch of those yellow plastic cups, and then, went to my well-ventilated garage, and started melting one with my nice and spiffy heat gun. The first attempt, though, I learned a couple of things:
1) this kind of plastic curls up, and distorts as it gets heated and melts, which creates this awesome etherial or organic shape I was looking for.
2) this kind of plastic hardens and contracts after doing all of #1, making it a bit more solid when finished
3) the thicker, load-bearing portions of these cups (like the base and the rim), after contracting, become opaque, so they need to be removed (unless you want to break up the look with a few lines of solid color, which also works)
4) it's very difficult to have some big, impressive effect part (for a person's size, though you can have plenty of action-figure-sized ones from just one cup) from just one cup, so you need to attach multiple cups to each other
5) attaching cups to each other is harder than I thought as most adhesives will stop working under the heat. I needed something solid like staples or even better (but takes up a lot more time) nylon thread and basically stitch patches of plastic cup parts together
After all that, I had one of these:
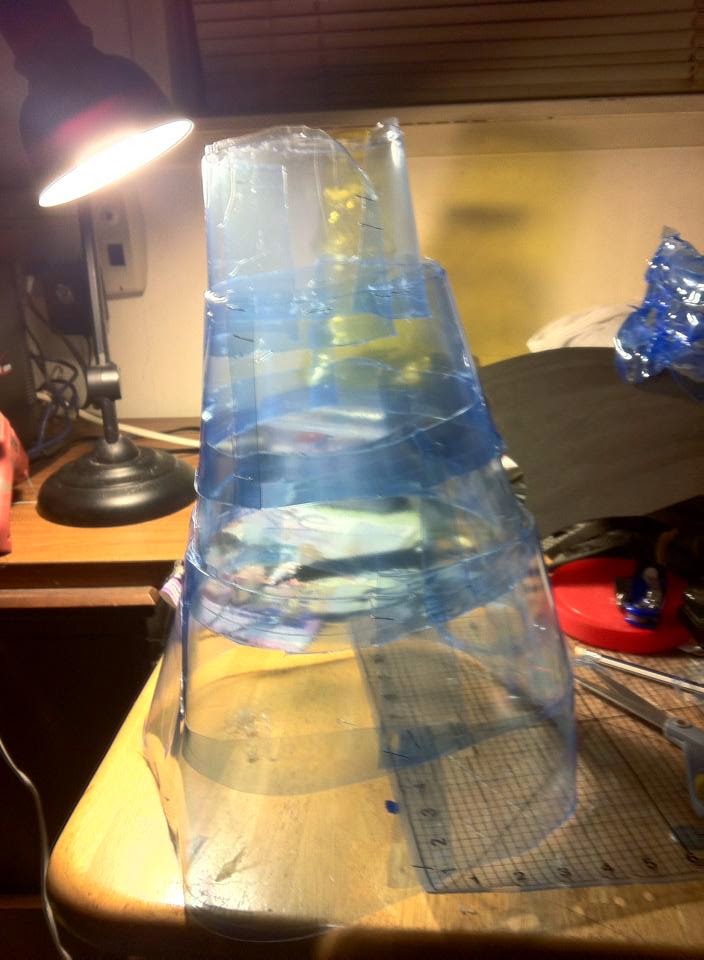
and it turned into this!

My first attempt was interesting. It had a very open hole in the middle, and was too large even for my hand to hold effectively. It did, however, have a large enough hole to fit a person's foot, up to his/her ankle, and being blue (maybe with some paint apps to simulate frost), it would be a practical effect for captain cold, for when he freezes the foot of a speedster (or just anybody who would step into the effect part).
After that, it became easier. It was fun to experiment with different shapes of attached plastic, and see how they each turned out.
That initial set of yellow cups, it could very well be a Sinestro Corp Ring effect part, or with some paint apps or if mixed with some red or orange plastic, would be just one giant fireball or flame blast.

The other blue effect part, I would use for my Brother Warth, as some blue energy. I'm still figuring out (the easy part) how to attach it onto the front of the lantern or a more effective way to latch it onto the LED ring, becaue it lightpipes very well. I am even thinking of putting some reflective vinyl inside one of these, and it'll glow magnificently through the clear plastic.
The blue effect part can also attach onto the tip of my fog gun. With the light, fog, and frosted translucent piece, it'll look like a nice simulated ice or cold blast.
The green one, because I used a very different pattern of attaching the plastic, ended in this interesting spiral pattern. Though some people told me that it would work as a green slime splatter more than emerald energy for a Green Lantern, I consider it the piece's flexibility.

I also, in the future, will start working with clear plastic since the availability of colored plastic is very sporadic and rare, depending on what's in season. Right now, there are a lot of red for Valentine's day, and Green for St. Patty's. I even ran out of yellow, and cannot, for the life of me find it, even online. So I decided, I will take charge of this and use clear plastic cups, which are always available, and I will use translucent paint instead. This will also allow me to be more consistent with the coloring of these things.
I'm also thinking of using lamination sheets instead of cups, so i can control the shape and pattern even better.
John Garcia is a long-time convention goer and cosplayer. You can see some of his other cosplay constructions in our archives.
Did you enjoy this article? Follow us on Facebook to get more great content! We have a weekly podcast you can find on our main site. Also follow us on Twitter and Tumblr!
John Garcia is a long-time convention goer and cosplayer. You can see some of his other cosplay constructions in our archives.
Did you enjoy this article? Follow us on Facebook to get more great content! We have a weekly podcast you can find on our main site. Also follow us on Twitter and Tumblr!
No comments:
Post a Comment